
Prerequisites
Setup requires access to the ALICE Admin Portal, your Teams admin center, and your Azure portal, so you may need to coordinate with your IT team.
- Microsoft Azure admin user.
- Teams admin user.
- A dedicated Teams user from your organization for the ALICE Receptionist system.
- An ALICE Client Admin user for the ALICE Admin Portal.
Navigating the ALICE Admin Portal
-
Log in to the ALICE Receptionist Admin Portal with a user account with the Client Admin role.
-
Navigate to the Account Management menu and select the Global Setting menu.
- Click the Sync Integration tab.
Connect to Microsoft Teams
-
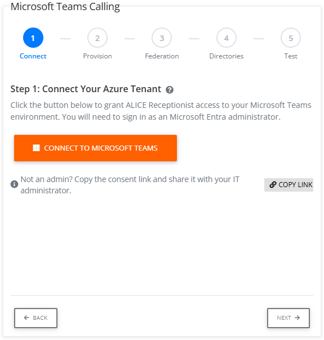
Click the Microsoft Teams sub tab to open the Microsoft Teams Calling Wizard.

If you are not an admin for your organization's Teams account, click the Copy Link button. Send the link to your Teams administrator.
They will need to use that link to approve the ALICE Receptionist application before you can continue with the wizard. Once the Teams admin has completed that step, proceed to the Configuring Federation Settings section.
-
If you are an admin for your organization's Teams account, click the Connect to Microsoft Teams button on the wizard screen.
-
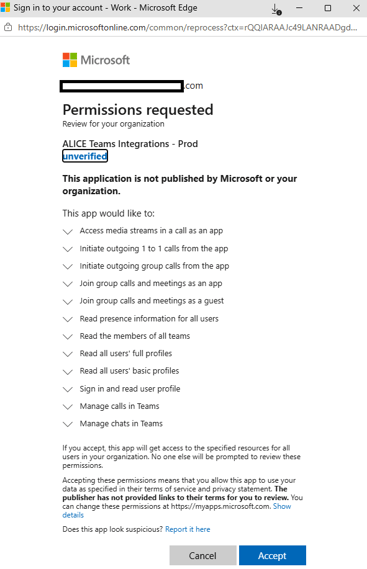
The Microsoft Login window will open. Log in to your organization's Microsoft account and approve permissions needed by the ALICE app.
-
A message will appear confirming the connection.
Provision Your ACS Resource
-
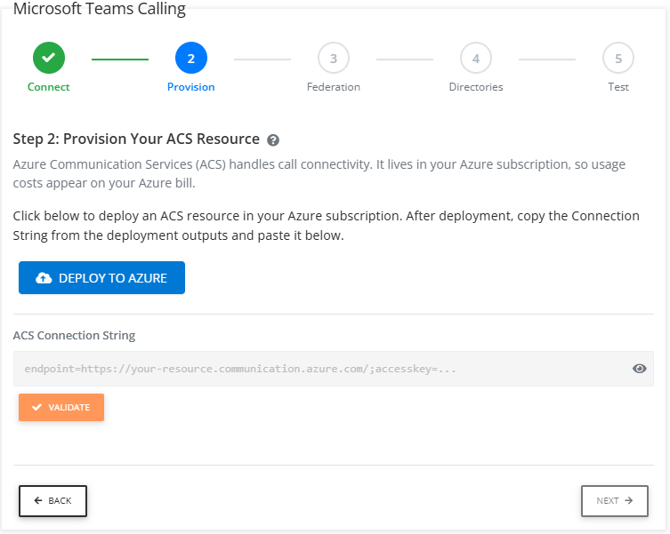
Click the DEPLOY TO AZURE button.
-
You will be prompted to log in to your Microsoft tenant to approve and create the Teams calling deployment.
-
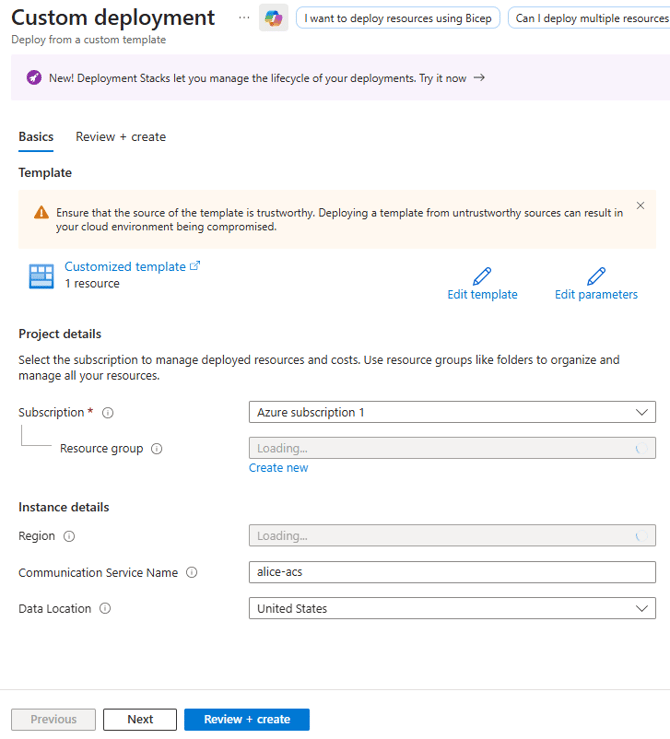
Select your Subscription and Resource group. Click the Review + Create button to create the deployment.
-
The Terms page will be displayed for your review.
-
Next, click Create to create the deployment.
-
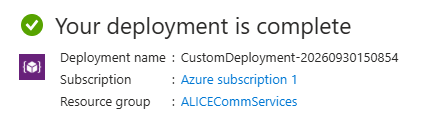
Once the deployment has completed, you will see a message similar to this:
-
Navigate to the Communication Service > Settings > Keys page.
-
Copy the Connection String from the Primary key.
-
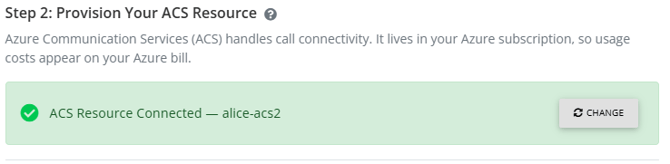
Return to the ALICE Admin Portal and paste the connection string into the Connection string field and click the Validate button. If successful, you will see the following success message.
Configuring Federation Settings
-
Click the Next button to move to step 3. Your Teams admin for your organization will need to run a PowerShell script to configure Federation settings.
Be sure to insert your ACS immutable_resource_ID, which can be found on the resource Settings > Properties page on your Azure portal in place of the PowerShell script before running the script.
-
Next, click the I've Run the Script button to continue.

Assigning Teams Credentials to a Directory
-
Click the Next button to move to the Step 4 screen.
-
Expand the directory you wish to assign the Teams credentials to.
-
Enter the Teams service account email address and password.
-
Click the Validate & Save button to validate the Teams service account credentials. If successful, you will see the following confirmation message:

Testing the Connection
- Click the Next button to move to the Step 5 test.
- Test your configuration by selecting the directory you configured above.
- Enter the ALICE Teams user's email address to test a call connection.
The test will not perform an actual call but will test the connection configurations.
OPTIONAL Configuring ALICE For Calls to Non-Teams Users (PSTN Calling)
You can use the ALICE Cloud communication service or configure your ACS service with your organization's phone number for PSTN calling to non-Teams users.
A non-Teams user is defined as any phone number, such as a mobile phone or desk phone number. These are often referred to as PSTN numbers.
-
Expand the Configure PSTN Calling (optional) section and follow the instructions provided.
-
Once you have acquired a phone number, enter it in the PSTN phone number field and press the Save PSTN Number button. A confirmation message will verify the phone number entered has been saved.

Finalizing the Connection
Once the test succeeds, click the Finish Setup button.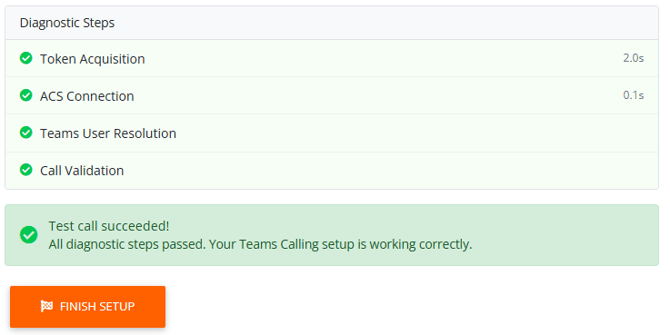
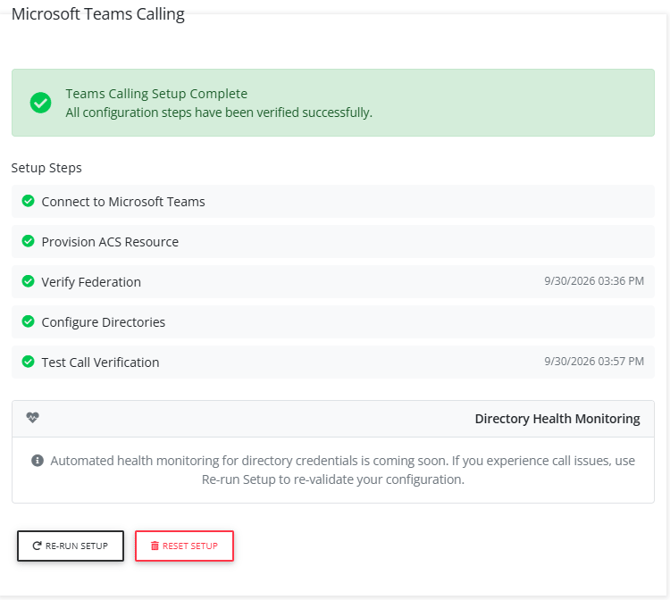
A summary page will be displayed. That completes the Teams calling integration setup.
Editing Your Microsoft Teams Connection
To review or make changes to your settings, click the Re-Run Setup button. This will keep your existing settings but allow you to make changes.
To clear and reset your configuration settings, click the Reset Setup button. This will clear your existing settings and restart the wizard.